Configuring forms based authentication (FBA) in SharePoint 2013 is very similar to SharePoint 2010, but there are some differences due to SharePoint 2013 using .Net 4.0. The web.config entries entries are slightly different. As well, IIS doesn’t support editing .Net 4.0 membership provider configuration through the IIS interface, so all of the configuration has to be done directly in the .config files. I’ll go through all of the steps required to setup FBA for SharePoint 2013, from start to finish.
Section-1 Creating the Membership Database
The first thing you need when configuring FBA for SharePoint is a place to keep all of the usernames and passwords. ASP.Net comes with a tool that we’ll use to create a membership database to store the logon information.
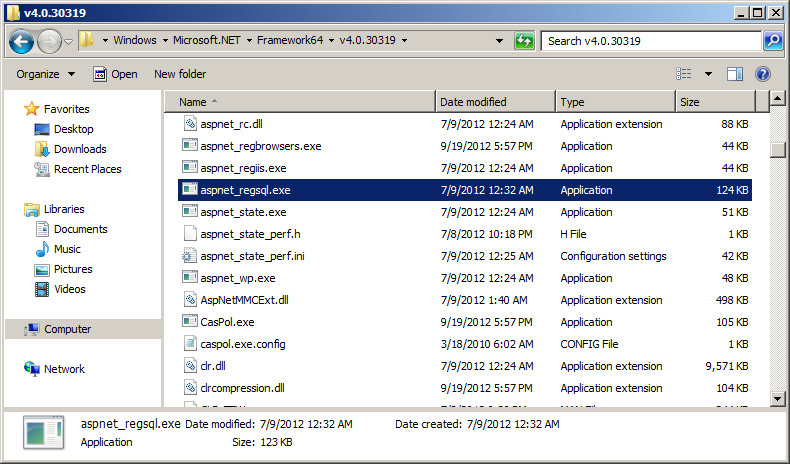
- Navigate to c:\windows\Microsoft.NET\Framework64\v4.0.30319\
- Run “aspnet_regsql.exe”
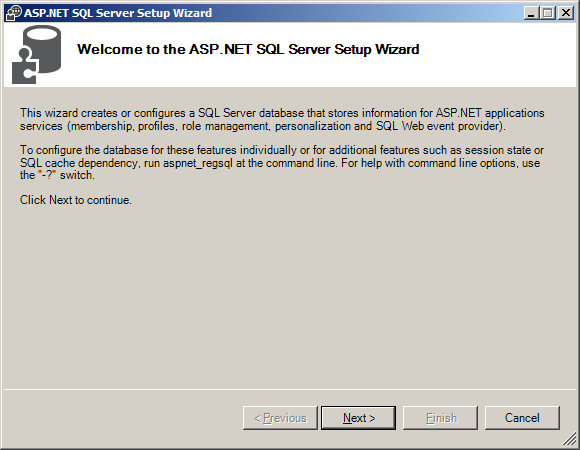
- A welcome screen will appear. Click Next.
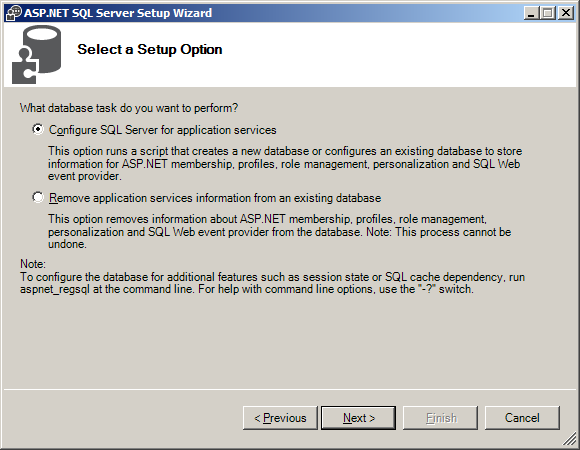
- Select “Configure SQL Server for application services” and click Next.
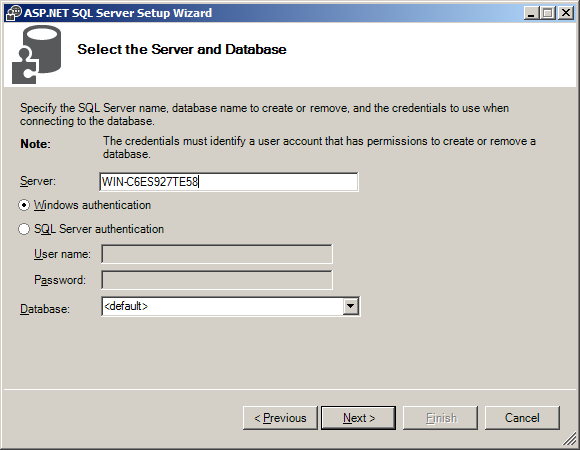
- Enter the name of your server and your authentication information. In this case SQL Server is installed on the same server as SharePoint 2013 and I am logged in as an administrator and have full access to SQL Server, so I choose Windows Authentication.For the database name, I just leave it as <default>, which creates a database called “aspnetdb”.
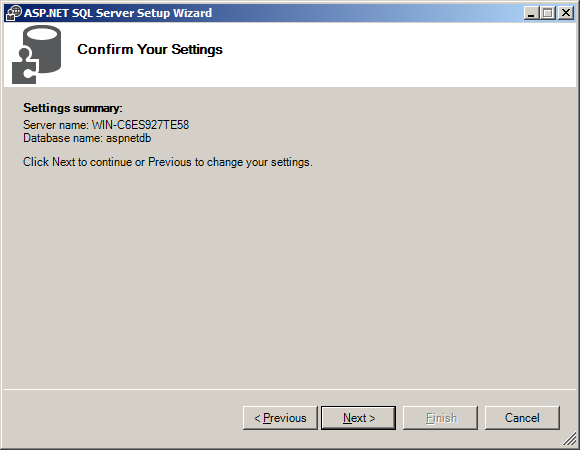
- A Confirm Your Settings screen will appear. Click Next.
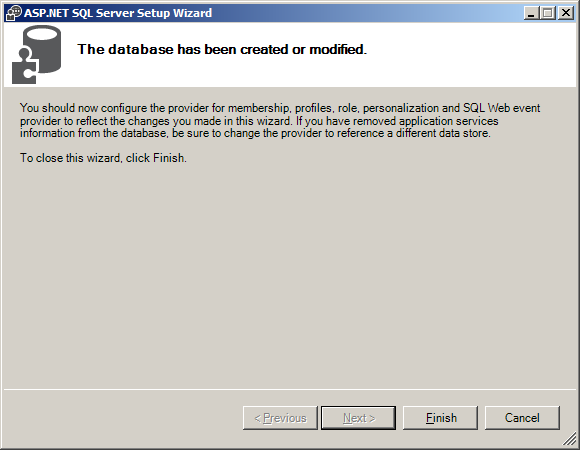
- A “database has been created or modified” screen will appear. Click finish and the wizard will close.
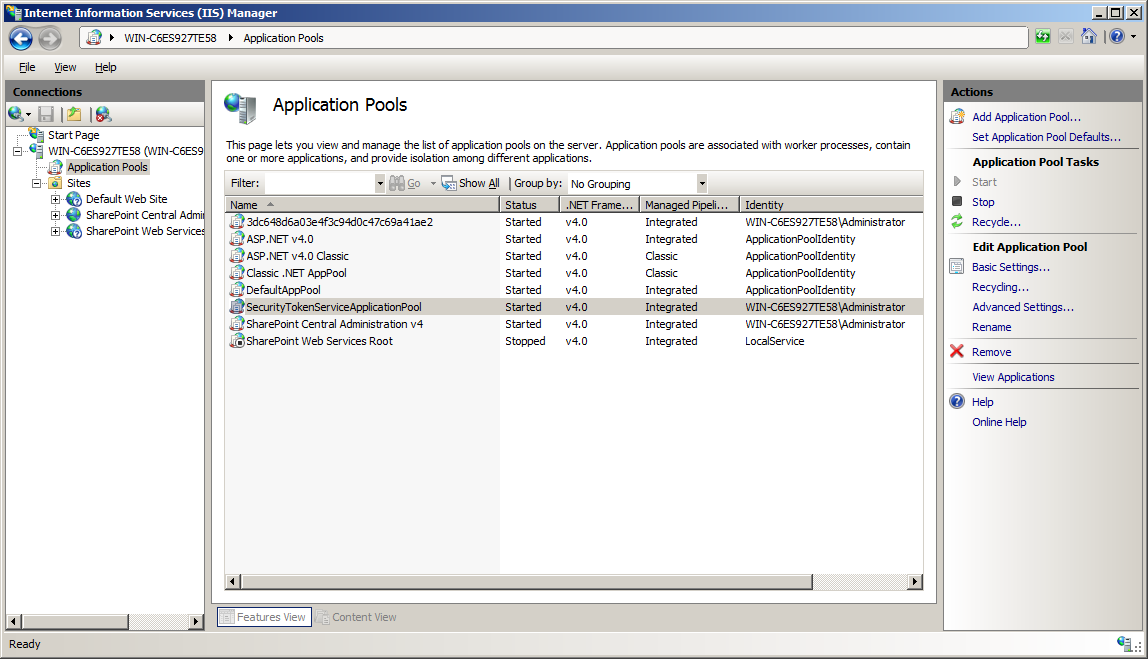
- Now that the database has been created, we’ll have to give SharePoint permissions to read and write to it. We’re going to connect to the database with Windows Authentication, so we’re going to have to give those permissions to the service account that is being used to run SharePoint.First, let’s find out the service account that’s being used to run SharePoint. Open IIS, go to “Application Pools”. Take a look at the “Identity” that is being used to run the SharePoint application pools. On my test server, it happens to be my administrator account that is being used, but it will probably be different on your machine. Make note of the identity used.
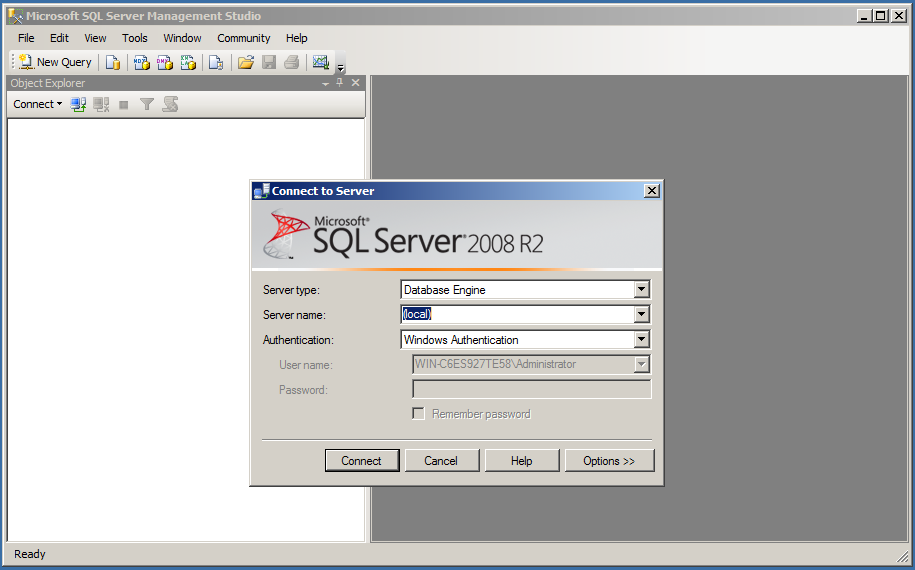
- Now that we know what account is being used to run SharePoint, we can assign it the appropriate permissions to the membership database we created. Open up SQL Server Management Studio and log in as an administrator.
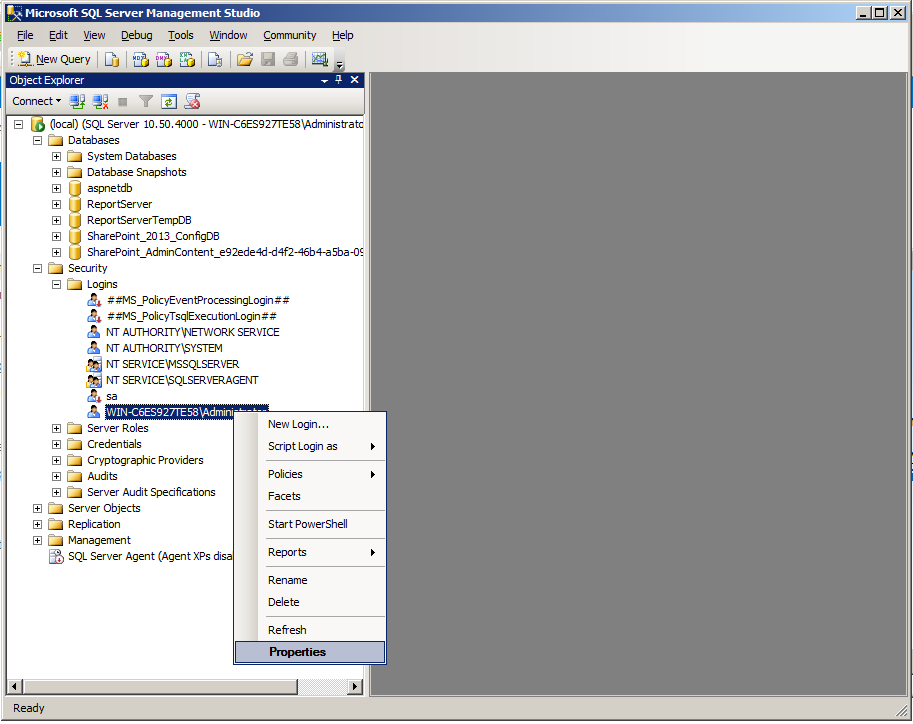
- Under Security/Logins find the user that SharePoint runs as. Assuming this is the same database server that SharePoint was installed on, the user should already exist.Right click on the user and click
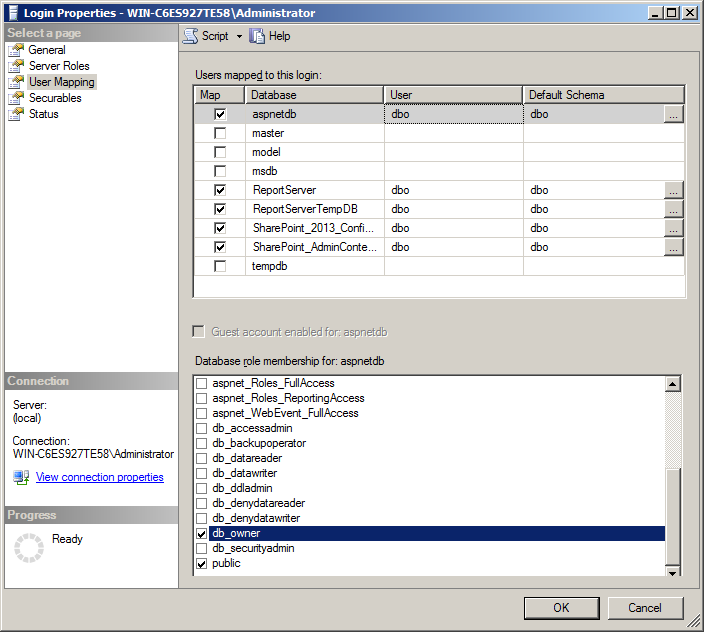
‘Properties’.- Go to the “User Mapping” Page. Check the “Map” checkbox for the aspnetdb database. With the aspnetdb database selected, check the “db_owner” role membership and click OK. This user should now have full permissions to read and write to the aspnetdb membership database.
Section-2 – Adding users to the Membership Database
If you’d like to be able to manage the users outside of SharePoint, and setup some inital users, then continue on to learn how to manage the FBA users with IIS.
To manage users in IIS, we’re going to create a dummy site just for managing users. In SharePoint 2010 and earlier it was possible to edit the users directly from a SharePoint web application site, as long as the default membership provider was set to the membership provider you were going to edit. This is no longer possible, as previous versions of SharePoint ran against ASP.NET 2.0 (3.5), but SharePoint 2013 runs on ASP.NET 4.0. IIS does not support editing users and roles for ASP.NET 4.0 applications. To get around this, we’ll create a dummy/blank ASP.NET 2.0 web site just for editing users. The asp.net 2.0 and 4.0 membership databases are exactly the same, which makes this possible.
NOTE: These directions were created on Windows 2008 R2. On Windows 2012 they have reversed things and the .Net Users and .Net Roles options are only available for .Net 4.0 and are not available for .Net 2.0 – So on Windows 2012 please use .Net 4.0 where 2.0 is mentioned in the directions.
- Open IIS.
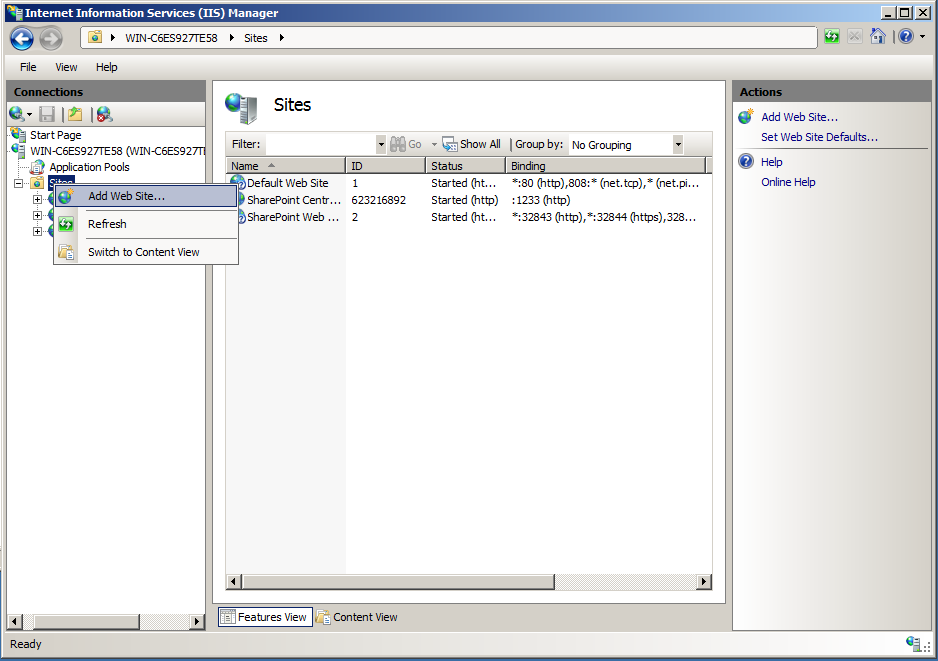
- Right click on Sites and select “Add Web Site…”
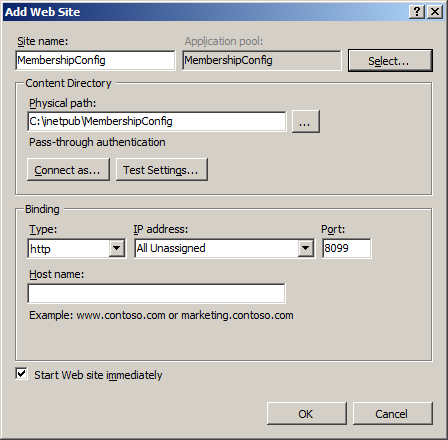
- A configuration dialog will appear. Just give it a meaningful name, point it to an empty folder and give it a random unused port number and click OK.
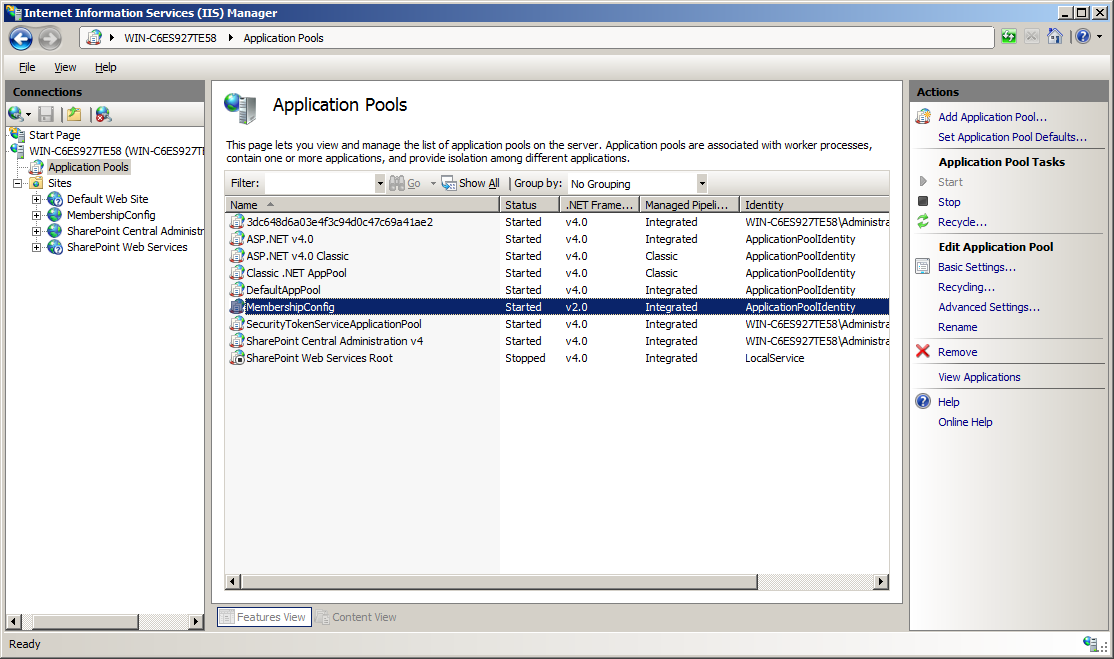
- Click on “Application Pools”. An application pool of the same name should have been created. The .Net Framework for that application pool should show as “2.0″. If it doesn’t, you’ll need to modify it’s settings and change it to “2.0″.
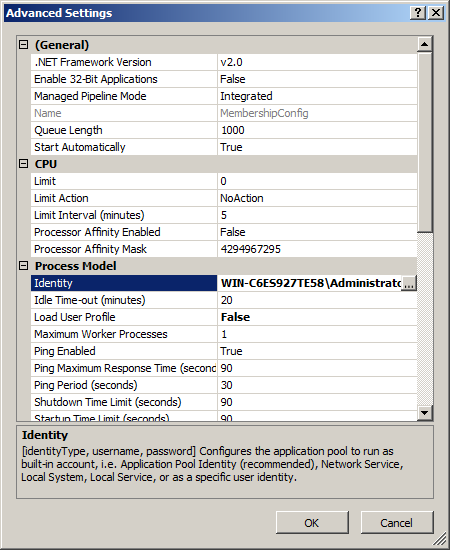
- You’ll also have to set the identity the account runs as to the same as SharePoint, so that it will have permissions to read and write to the membership database. Select the application pool and click “Advanced Settings…” in the right panel. In the dialog that comes up, click on the Identity to change it. Choose “Custom account” and enter the SharePoint service account username and password. Click OK on all of the open dialogs to close them.
- The identity should now match the identity used for the SharePoint application pools.
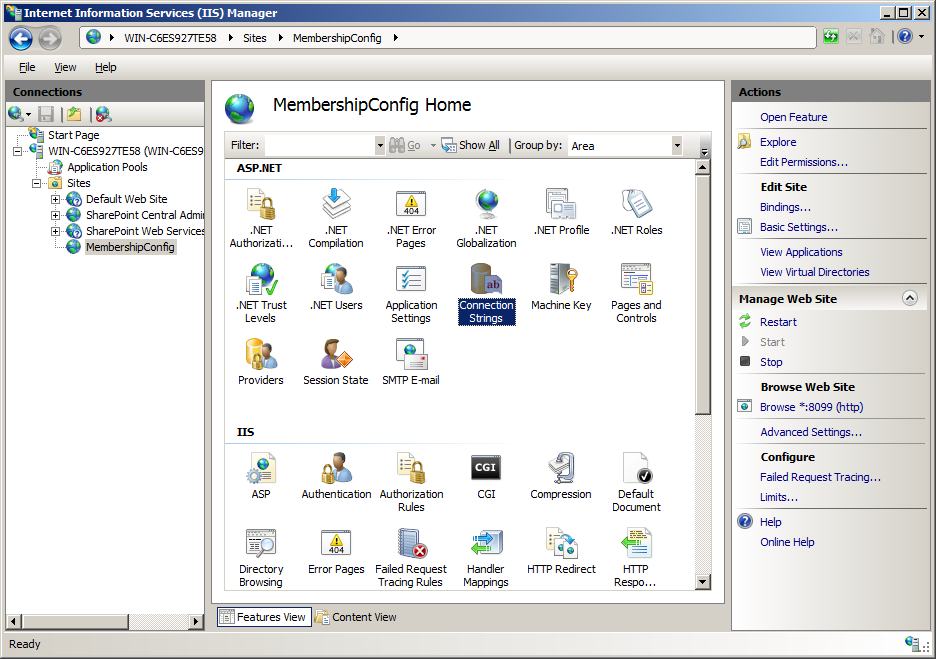
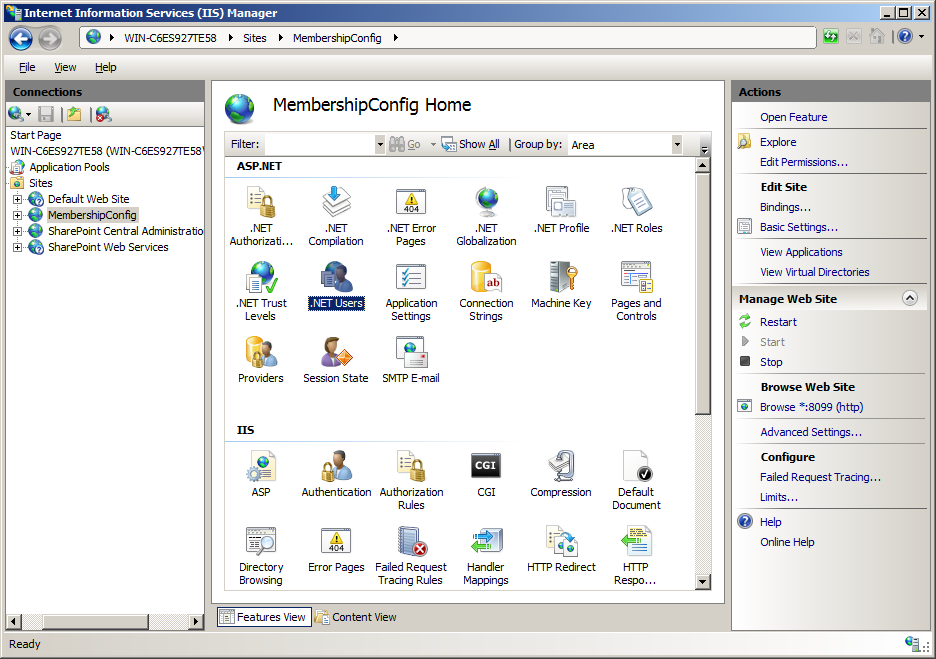
- We’re now going to create a database connection to the membership database. Select your new site and open the “Connection Strings” page from the Features view.
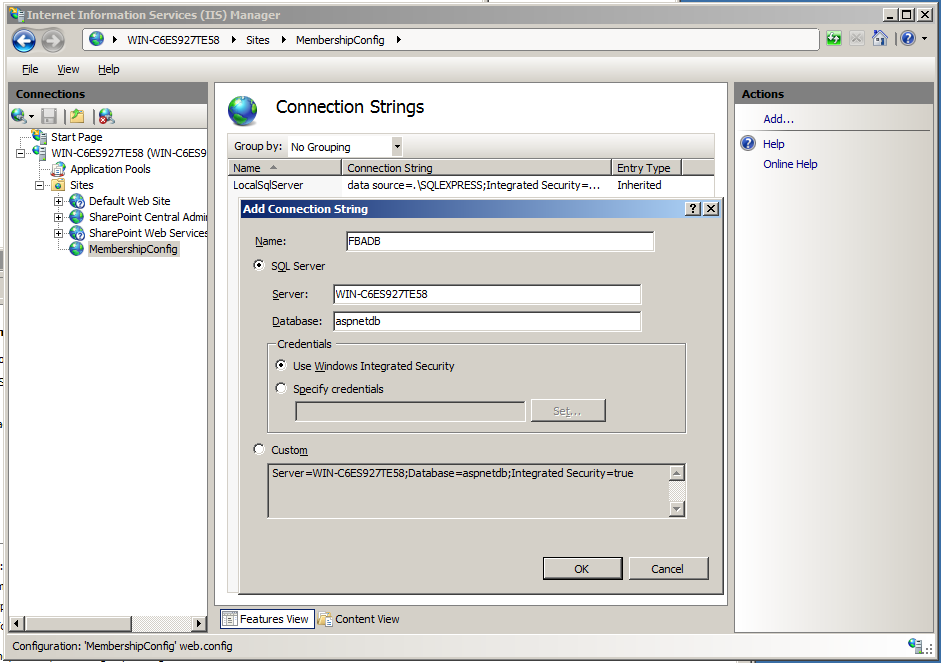
- From the Connection Strings page, click “Add…” on the right side panel. On the Add Connection String dialog that appears, give it a name (I used “FBADB”), enter your server name and enter “aspnetdb” for your database name. Select “Use Windows Integrated Security” and click OK. We’ve now created the database connection.
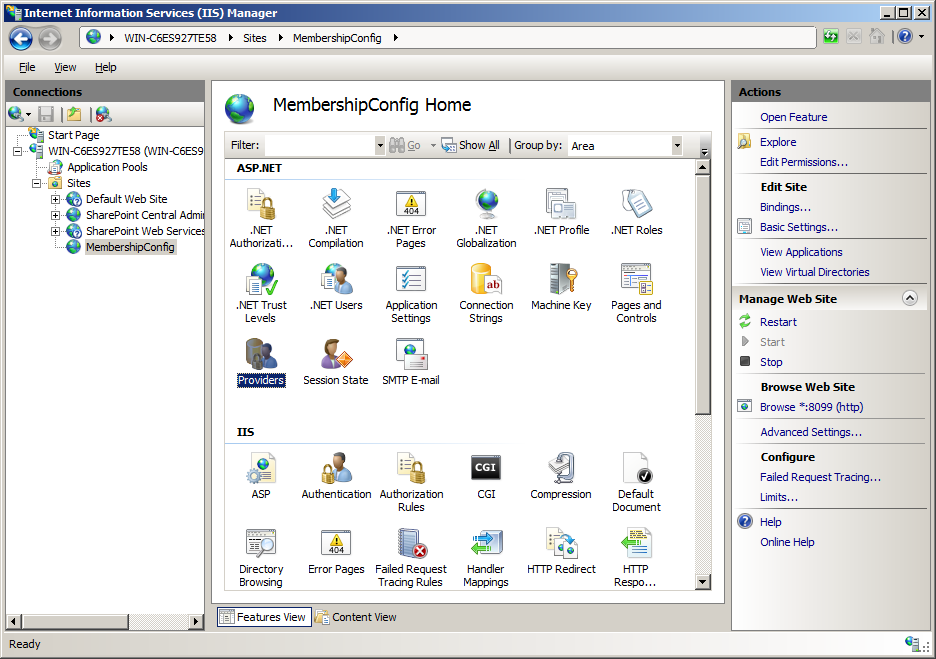
- We’re now going to create the membership provider, that will let us edit users in the membership database. From the site Features view, click “Providers”. (If “Providers”, “.Net Users” and “.Net Roles” is missing from the features view, then the associated application pool is configured for .Net 4.0. Go back and configure it for .Net 2.0).
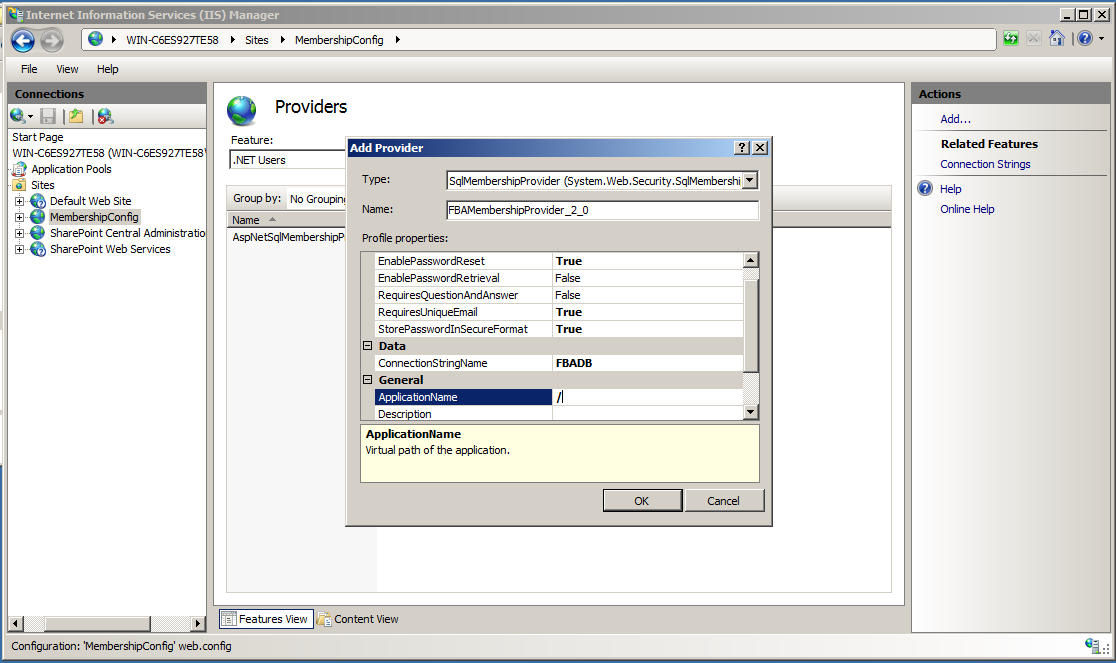
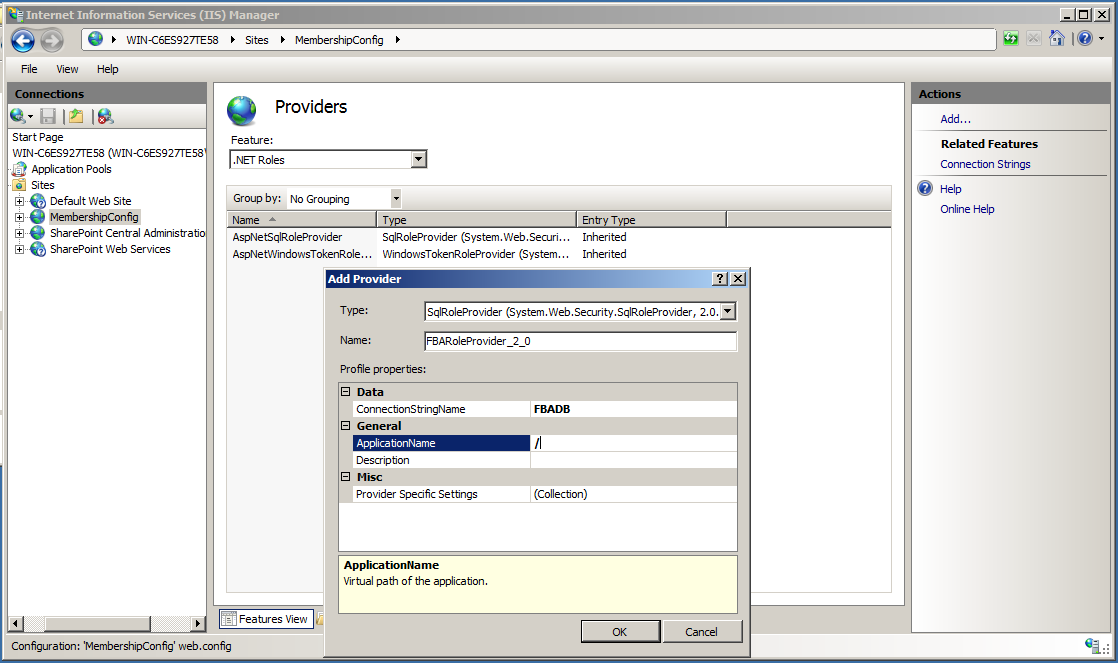
- From the Providers page, select “.Net Users” under Feature. Click “Add…” in the right side panel. In the dialog that appears, chose “SQLMembershipProvider” for type. Give it a name. For this example I used FBAMembershipProvider_2_0. I added the _2_0 so as not to confuse it with the “FBAMembershipProvider” entry we will be creating when we set it up for SharePoint. Select the different options you want associated with your membership provider. I have some more detail on the options available in the next section when we setup the membership provider for SharePoint. One thing I must stress though is that the options you pick here MUST match the options you use when you setup the membership provider for SharePoint. If they don’t, the users you create here will not work properly.For options, I chose:
Click OK to close the dialog and create the membership provider.Option Value EnablePasswordReset True EnablePasswordRetrieval False RequiresQuestionAndAnswer False RequiresUniqueEmail True StorePasswordInSecureFormat True ConnectionStringName FBADB (This must match the database connection we setup earlier) ApplicationName /
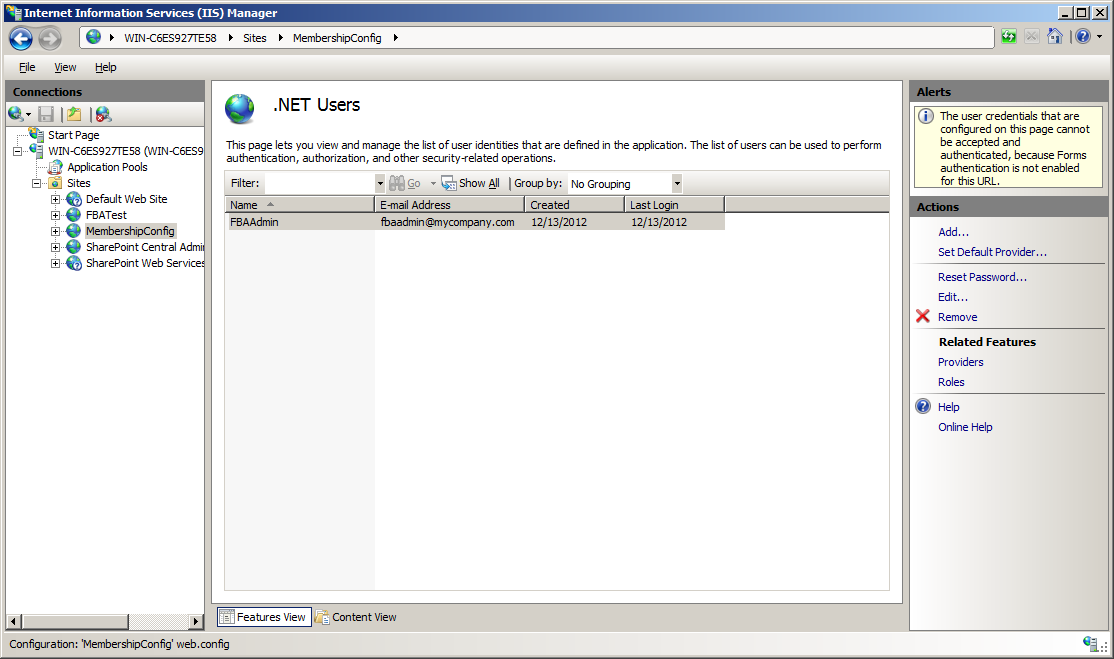
- We’re now going to add users to the membership database. Click “.Net Users” from the Features view.
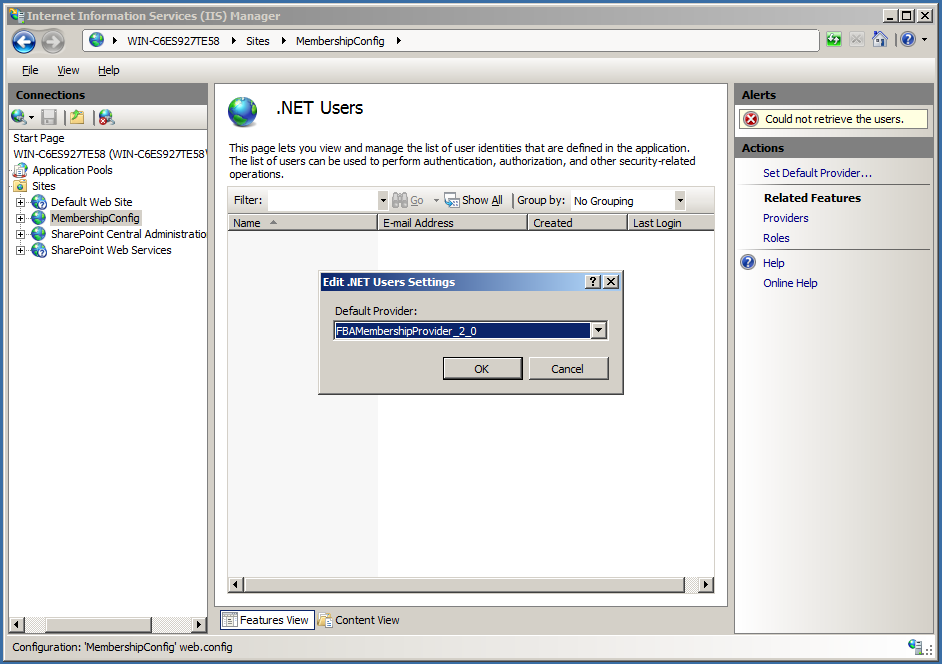
- The first thing we have to do before we can create users is configure the default membership provider. Click “Set Default Provider…” in the right side panel. When the dialog appears, choose the membership provider we just created and click OK.
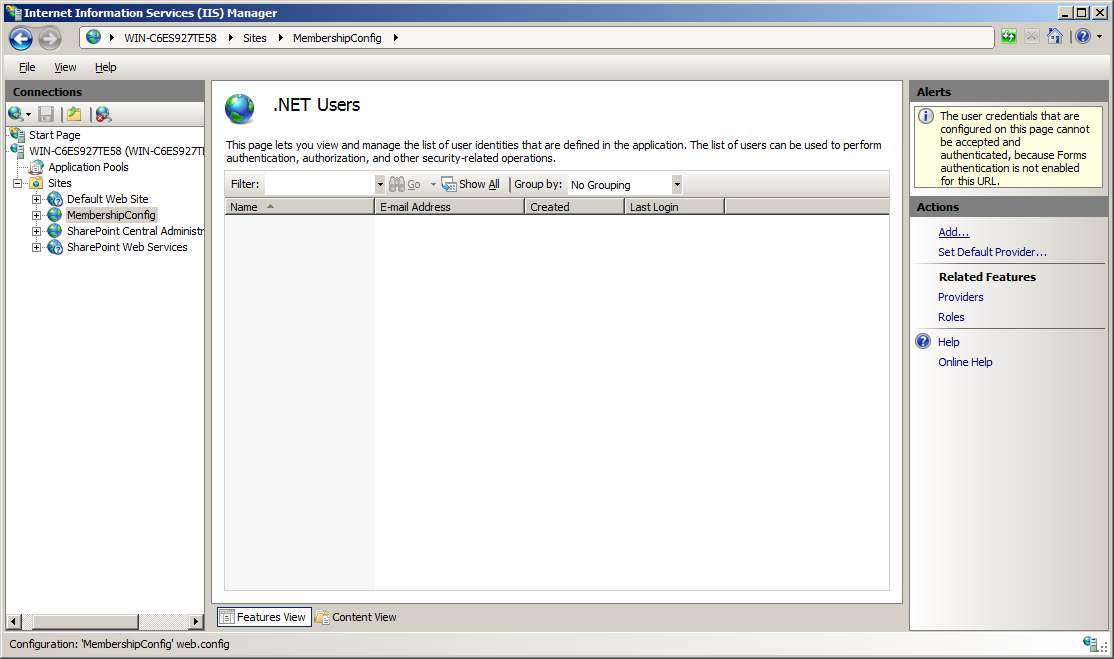
- Now that the default membership provider is selected, we’re presented with an empty .Net Users page, as there are not yet any users in the database. Click “Add…” in the right side panel to add a user.
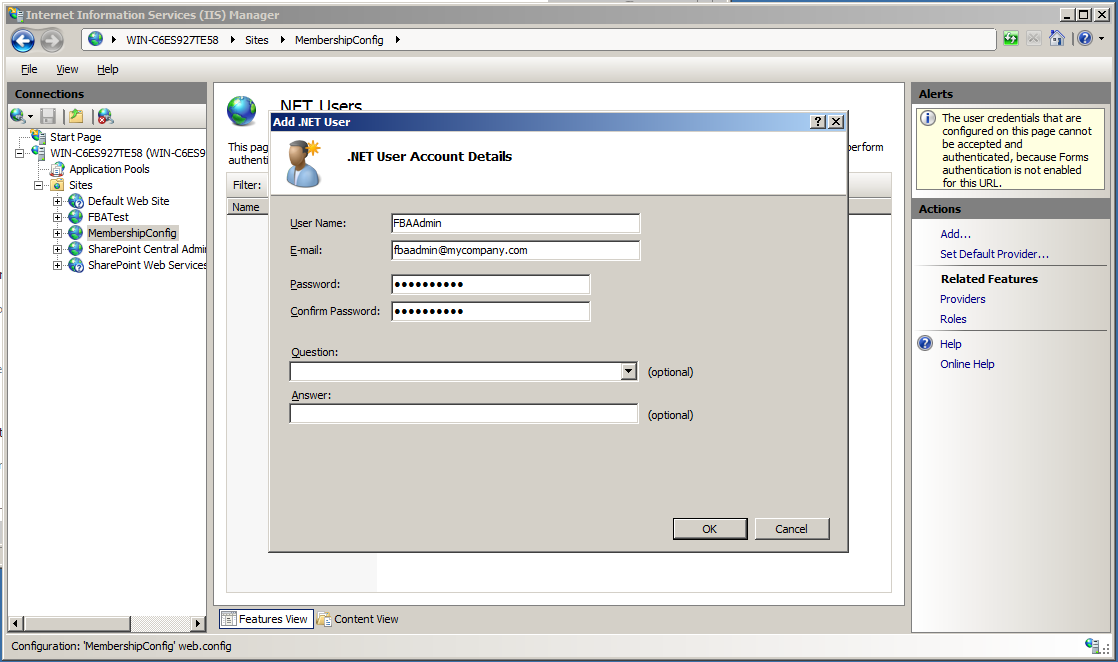
- From the “Add .Net User” dialog, give the user a name, email and password. In this example i’m creating an admin user that i’m going to use as the SharePoint Site Collection administrator.The password needs to be at least 7 characters long and must contain at least 1 non-alphanumeric character. Since we set RequiresQuestionAndAnswer to false when configuring the membership provider, the Question and Answer fields can be left blank.Click OK to create the user and close the dialog.
- Now the .Net Users page lists the one user you have created. You can use this page to add and edit users in the future.
- If you are going to use Roles in SharePoint, you can create a Role provider from the Providers page, and then use the .Net Roles page to add roles – very similar to how we added the membership provider and added users.

Section - 3 – Editing the Web.Config Files
The next thing that has to be done to get forms based authentication working with SharePoint is setting up the membership provider. A membership provider is an interface from the program to the credential store. This allows the same program to work against many different methods of storing credentials. For example you could use an LDAPMembershipProvider to authenticate against Active Directory, or a SQLMembershipProvider to authenticate against a SQL Server database. For this example we’re using the SQLMembershipProvider to authenticate against a SQL Server database.
SharePoint is actually divided up into several web applications – Central Administration, the Security Token Service and all of the SharePoint web applications that you create. Each of those web applications needs to know about the membership provider. Most tutorials have you adding the membership provider settings over and over again in each web config (as well as every time you setup a new SharePoint web application). I prefer to add the membership provider settings directly to the machine.config. By adding it to the machine.config, the configuration is inherited by all of the web.config files on the machine – so you only have to make the changes once, and don’t have to remember to make the changes every time you create a new SharePoint web application.
If you don’t have access to the machine.config, or prefer not to edit it, you will have to make all of these changes to the following web.config files:
SharePoint is actually divided up into several web applications – Central Administration, the Security Token Service and all of the SharePoint web applications that you create. Each of those web applications needs to know about the membership provider. Most tutorials have you adding the membership provider settings over and over again in each web config (as well as every time you setup a new SharePoint web application). I prefer to add the membership provider settings directly to the machine.config. By adding it to the machine.config, the configuration is inherited by all of the web.config files on the machine – so you only have to make the changes once, and don’t have to remember to make the changes every time you create a new SharePoint web application.
If you don’t have access to the machine.config, or prefer not to edit it, you will have to make all of these changes to the following web.config files:
- SharePoint Central Administration
- SecurityTokenServiceApplication
- Every SharePoint web application you create that you would like to access via FBA.
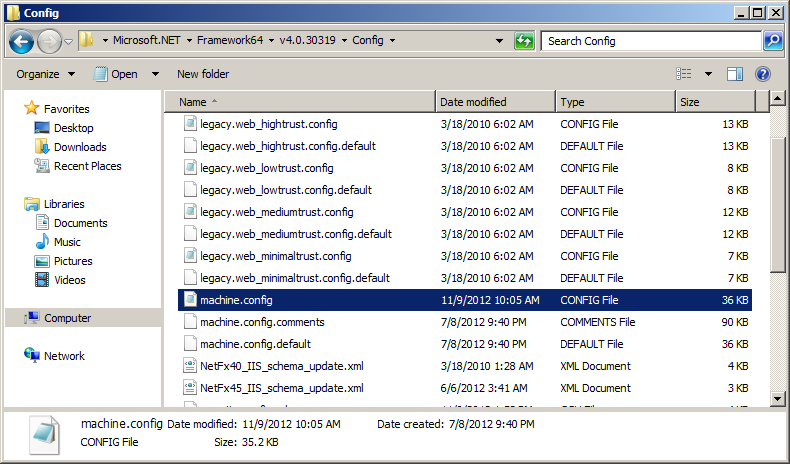
- Navigate to “C:\Windows\Microsoft.Net\Framework64\v4.0.30319\Config” and open “machine.config”.
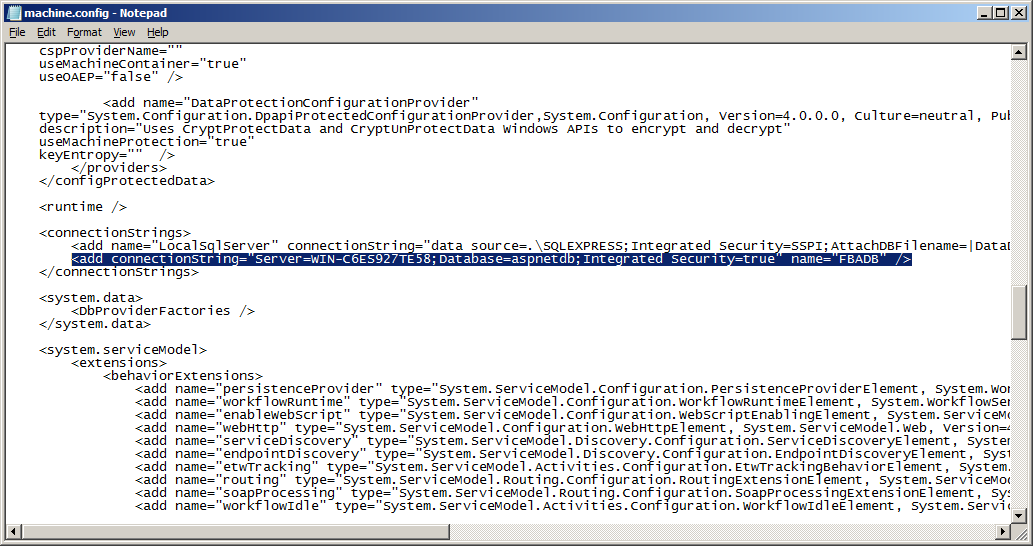
- In the <ConnectionString> section, add the following line:
<add connectionString="Server=WIN-C6ES927TE58;Database=aspnetdb;Integrated Security=true" name="FBADB" />
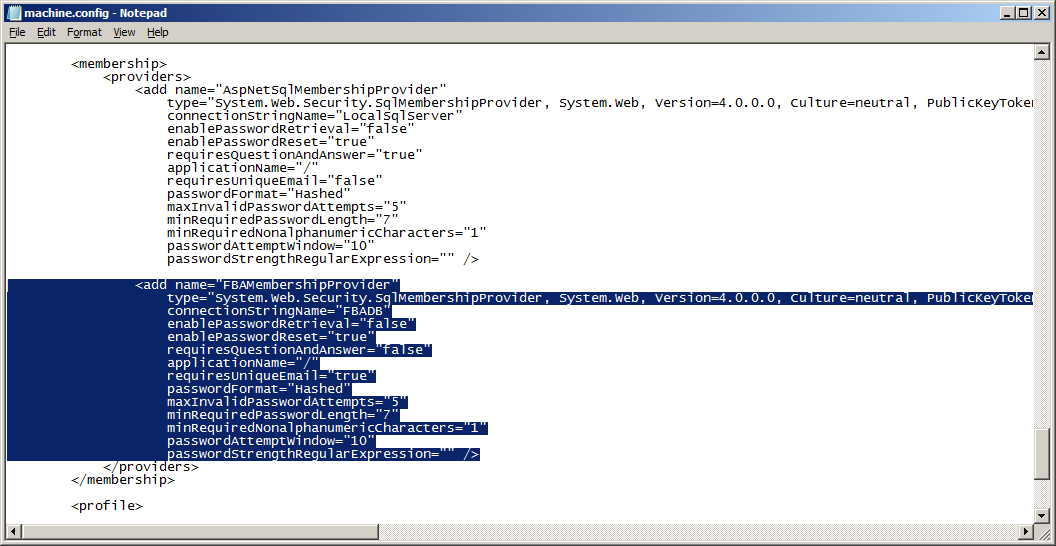
Be sure to replace the value for Server with the name of your SQL Server. - In the <membership><providers> section add the following:
<add name="FBAMembershipProvider"
 type="System.Web.Security.SqlMembershipProvider, System.Web, Version=4.0.0.0, Culture=neutral, PublicKeyToken=b03f5f7f11d50a3a"
 connectionStringName="FBADB"
 enablePasswordRetrieval="false"
 enablePasswordReset="true"
 requiresQuestionAndAnswer="false"
 applicationName="/"
 requiresUniqueEmail="true"
 passwordFormat="Hashed"
 maxInvalidPasswordAttempts="5"
 minRequiredPasswordLength="7"
 minRequiredNonalphanumericCharacters="1"
 passwordAttemptWindow="10"
 passwordStrengthRegularExpression="" />
You can customize the authentication by modifying each of these options. The most important thing to remember though is that if you define a membership provider in multiple locations for the same database, they MUST ALL USE THE SAME OPTIONS. Otherwise you’ll run into all kinds of problems with users created with one set of options, and later being authenticated against with a different set of options.
Here’s a description of the different options available:
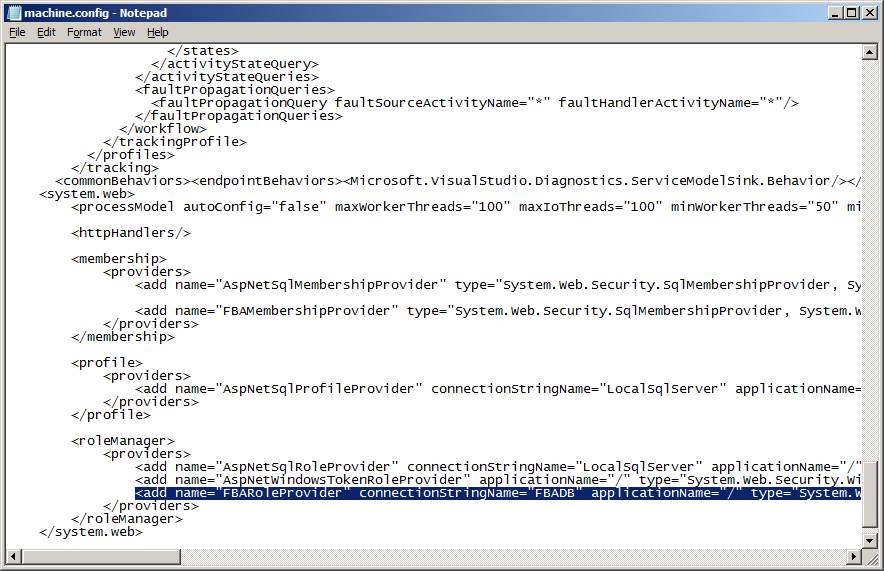
Option Description connectionStringName The name of the database connection to the aspnetdb database. enablePasswordRetrieval true/false. Whether the user’s password can be retrieved. I suggest setting this to false for security purposes. enablePasswordReset true/false. Whether the user can reset their password. I suggest setting this to true. requiresQuestionAndAnswer true/false. Whether accounts also have a question and answer associated with them. The answer must be provided when resetting the password. I suggest setting this to false, as setting it to true prevents an administrator from resetting the user’s password. applicationName Setting the application name allows you to share a single membership database with multiple different applications, with each having their own distinct set of users. The default applicationName is /. requiresUniqueEmail true/false. Determines if multiple users can share the same email address. I suggest setting this to false, in case you ever want to implement a login by email system. passwordFormat Clear, Hashed or Encrypted. Clear stores the password in the database as plain text, so anybody with access to the database can read the user’s password. Encrypted encrypts the user’s password, so although the password isn’t human readable in the database, it can still be decrypted and the user’s actual password retrieved. Hashed stores a one way hash of the password. When a user authenticates, the password they enter is hashed as well and matched against the stored hashed value. Using this method, the user’s password can never be retrieved (even if your database is stolen), only reset. I always recommend using “Hashed” as it is the most secure way of storing the user’s password. maxInvalidPasswordAttempts The number of times in a row that a user can enter an invalid password, within the passwordAttemptWindow, before the user’s account is locked out. Defaults to 5. passwordAttemptWindow The number of minutes before the invalid password counter is reset. Defaults to 10. minRequiredPasswordLength The minimum password length. Defaults to 7. minRequiredNonalphanumericCharacters The minimum number of non-alphanumeric characters required in the password. Defaults to 1. passwordStrengthRegularExpression A regular expression that can be used to validate the complexity of the password. - In the <roleManager><providers> section add the following:
<add name="FBARoleProvider" connectionStringName="FBADB" applicationName="/"
 type="System.Web.Security.SqlRoleProvider, System.Web, Version=4.0.0.0, Culture=neutral, PublicKeyToken=b03f5f7f11d50a3a" />
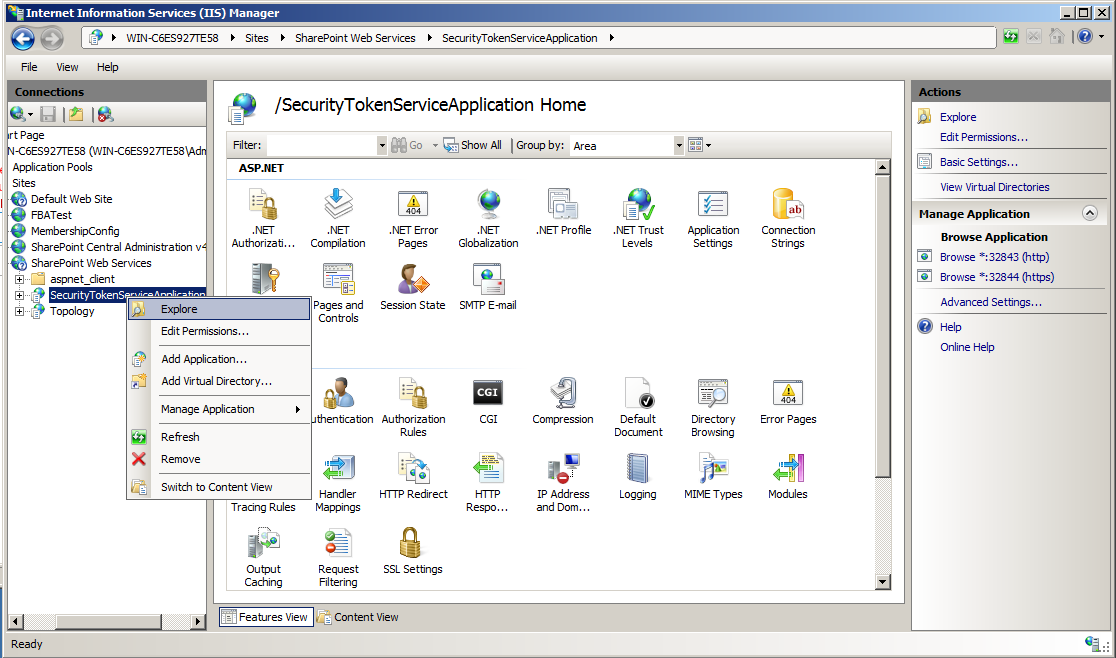
Save and close the machine.config file. - I mentioned that if you modified the machine.config, you’d only have to put the config in a single place. I wasn’t being completely truthful. The SharePoint Web Services configuration overrides the machine.config and clears the entries we created. For that reason, the membership and role providers also need to be added to the SecurityTokenService (But only there – you won’t have to add them to the central admin or other SharePoint web app web.configs.First we need to find the web.config for the SecurityTokenService. Open up IIS. Under sites, SharePoint Web Services, right click on SecurityTokenServiceApplication and click on Explore. Edit the web.config in the folder that opens.
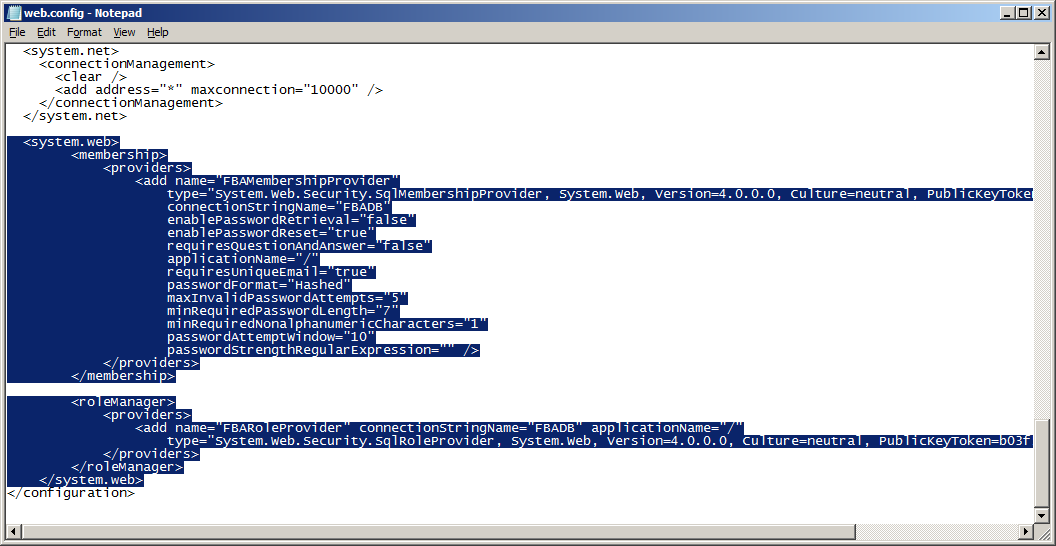
- Add the following to the web.config, just before the closing </configuration> tag:
<system.web>
 <membership>
 <providers>
 <add name="FBAMembershipProvider"
 type="System.Web.Security.SqlMembershipProvider, System.Web, Version=4.0.0.0, Culture=neutral, PublicKeyToken=b03f5f7f11d50a3a"
 connectionStringName="FBADB"
 enablePasswordRetrieval="false"
 enablePasswordReset="true"
 requiresQuestionAndAnswer="false"
 applicationName="/"
 requiresUniqueEmail="true"
 passwordFormat="Hashed"
 maxInvalidPasswordAttempts="5"
 minRequiredPasswordLength="7"
 minRequiredNonalphanumericCharacters="1"
 passwordAttemptWindow="10"
 passwordStrengthRegularExpression="" />
 </providers>
 </membership>
<roleManager>
 <providers>
 <add name="FBARoleProvider" connectionStringName="FBADB" applicationName="/"
 type="System.Web.Security.SqlRoleProvider, System.Web, Version=4.0.0.0, Culture=neutral, PublicKeyToken=b03f5f7f11d50a3a" />
 </providers>
 </roleManager>
 </system.web>
Remember to match all of the options with what was entered in the machine.config.Save and close the file.
Section-4 – Configuring SharePoint
Now that the membership and role provider have been configured, we can configure SharePoint to use them. For this example i’m going to create a new SharePoint web application. The same settings can be applied to an existing web application through the Authentication Providers dialog.- Open SharePoint Central Administration -> Application Management -> Manage Web Applications.
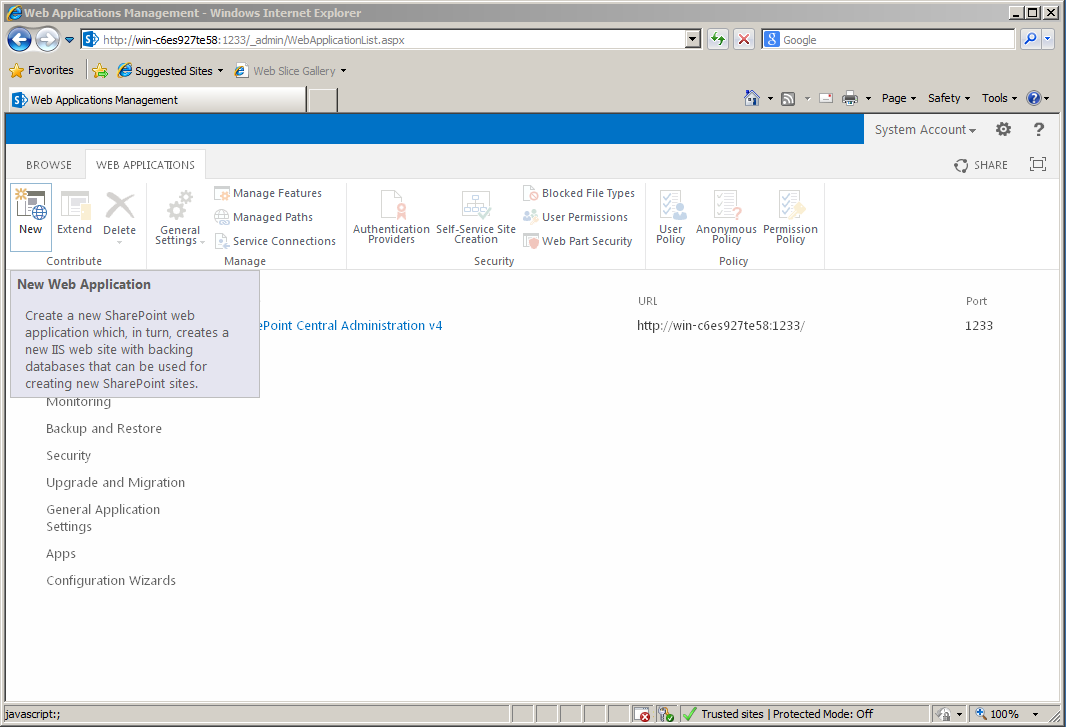
- Click “New” to create a new Web Application.
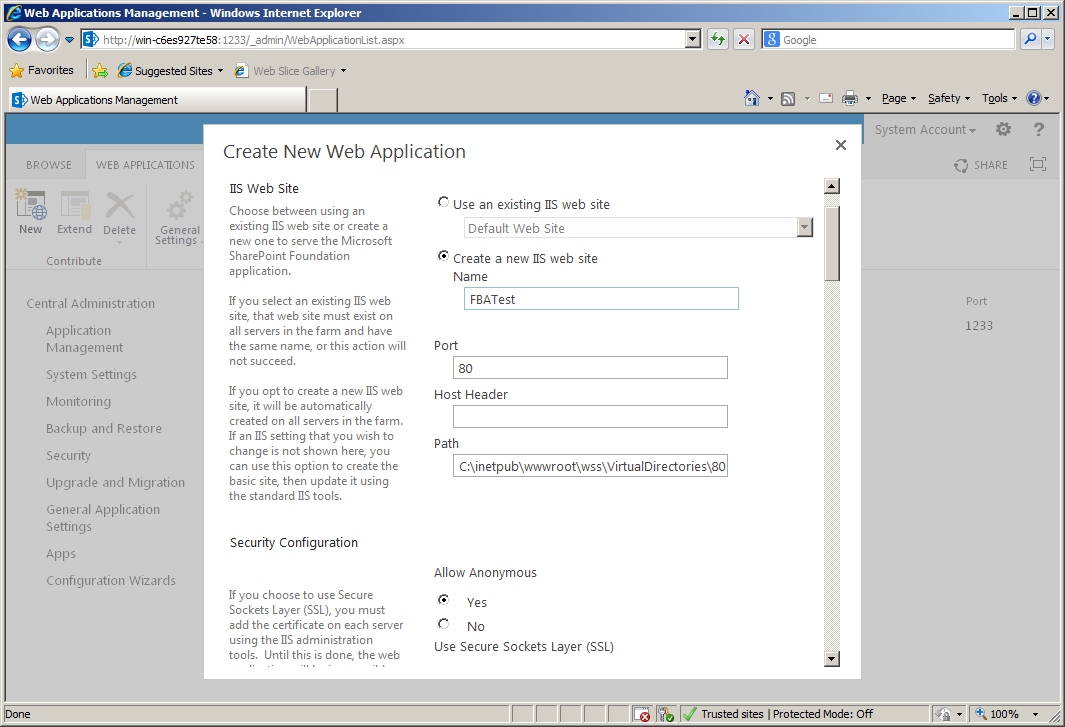
- Name the web application and adjust any other options to your preferences.
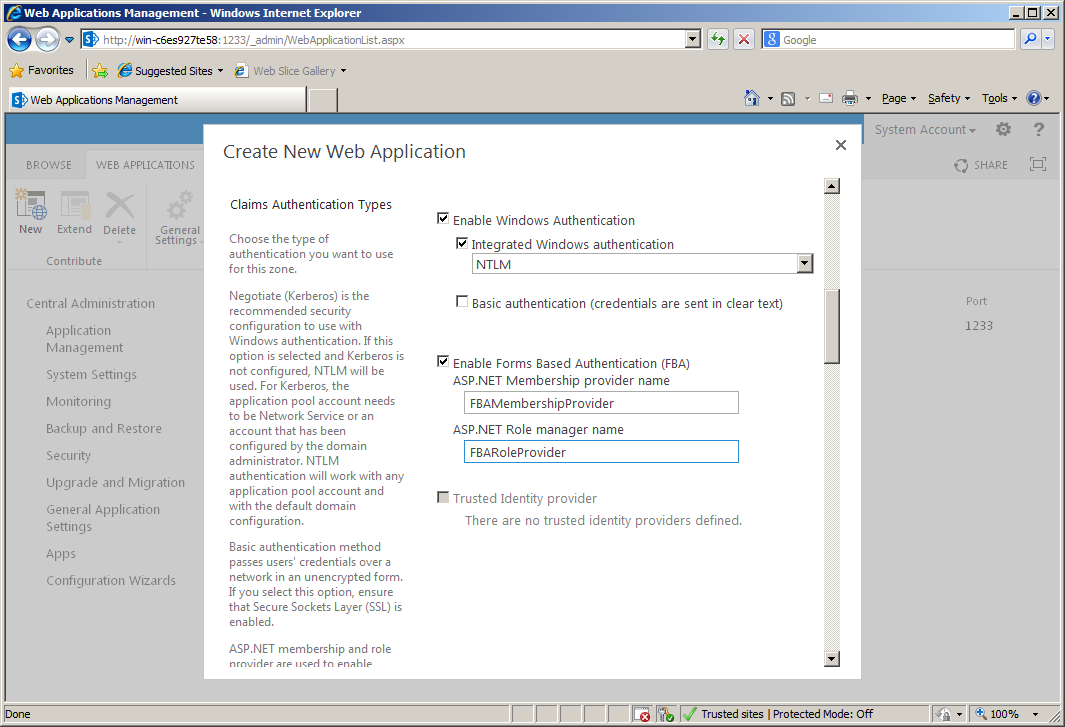
- Check “Enable Forms Based Authentication (FBA)”. Enter the ASP.Net Membership Provider Name and ASP.NET Role Provider Name that you configured in the web.config. For this example we used “FBAMembershipProvider” and “FBARoleProvider” (Without the quotation marks).Also, for this example we left “Enable Windows Authentication” checked. This allows us to login either via Windows Authentication or Forms Based Authentication (SharePoint will prompt you when you login for which method you’d like to use).Click OK.
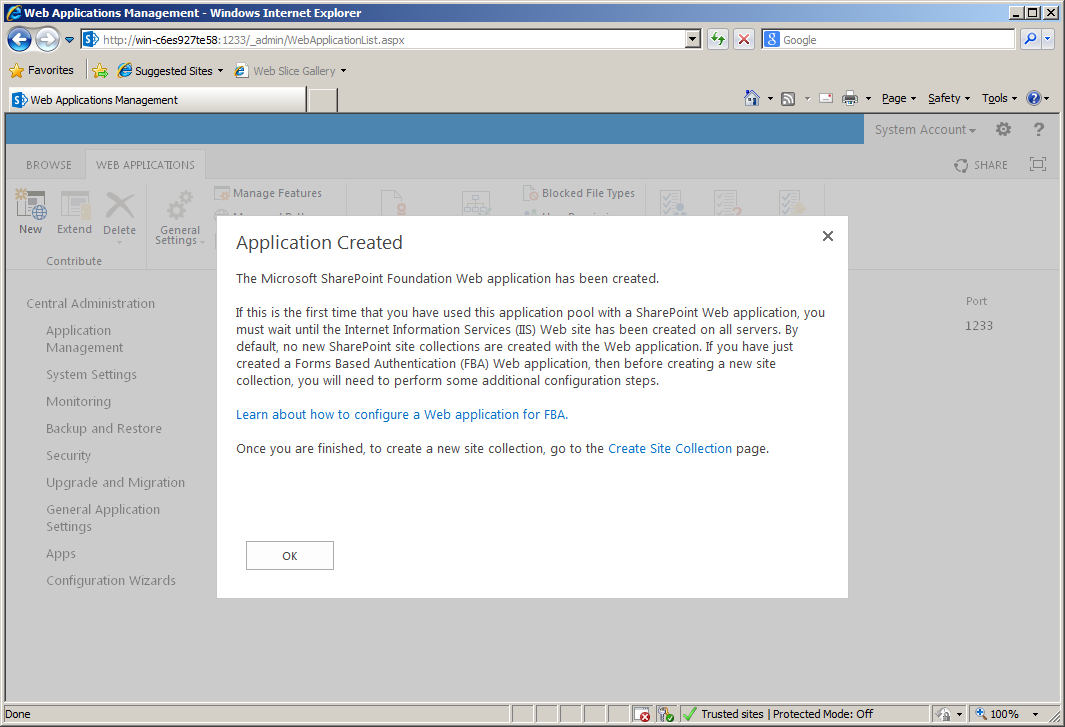
- An Application Created dialog will appear. Click the “Create Site Collection” link to create the first site collection for this web application.
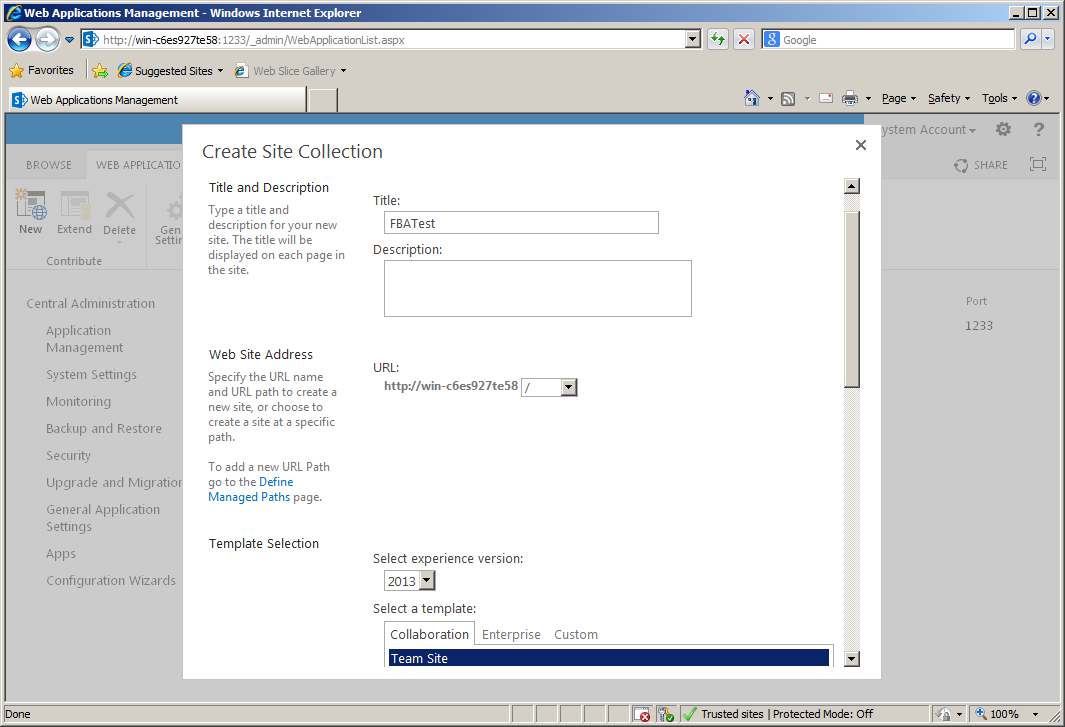
- From the Create Site Collection dialog, give the site collection a name and URL and select a template.
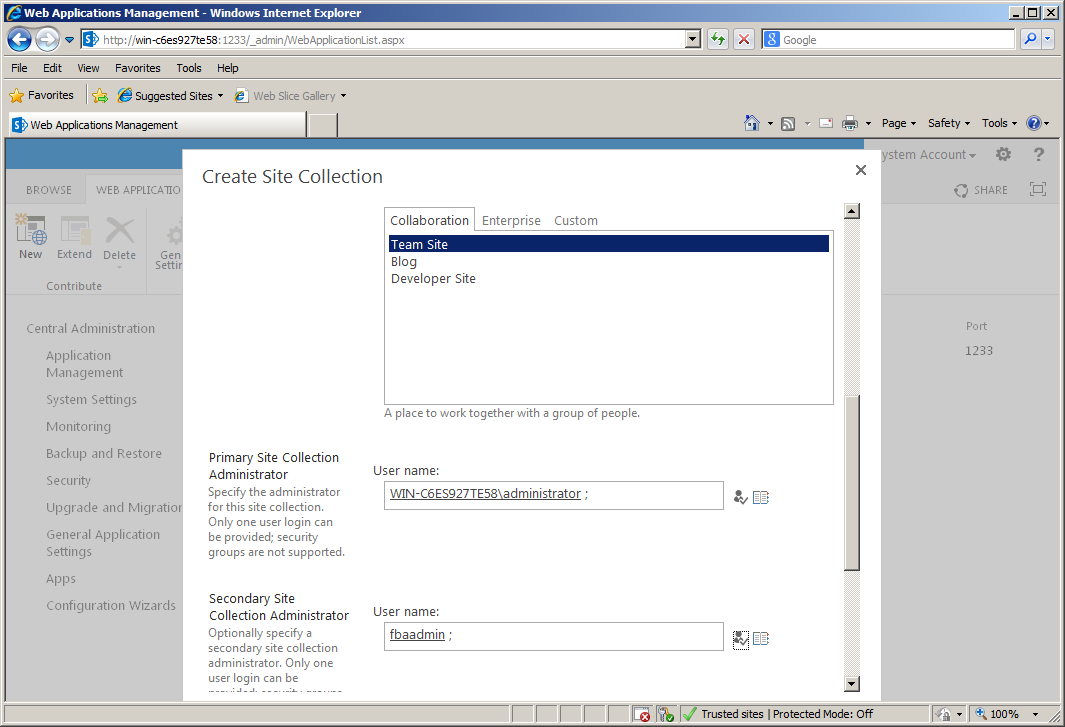
- For the Primary Site Collection administrator, i’ve left it as my Windows administrator account, so that I can login without FBA. For the Secondary Site Collection Administrator i’ve set it to ‘fbaadmin’ – the FBA account we setup in Section-2 (If you skipped Section 2 because you’re using the SharePoint 2013 FBA Pack, then you can just leave this blank for now and use your domain account to login to SharePoint and create your FBA users). You can set these to whatever is appropriate for your setup. Click OK.
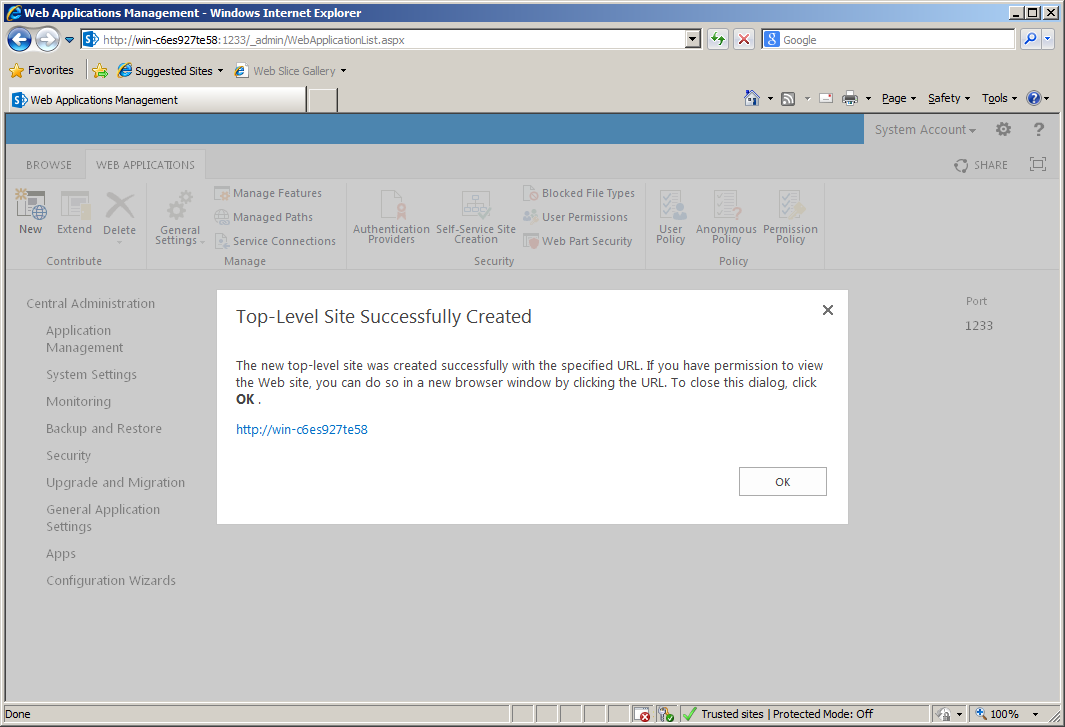
- You’ll get the “Top-Level Site Successfully Created” dialog. You can click on the URL to visit the new site collection you just created.
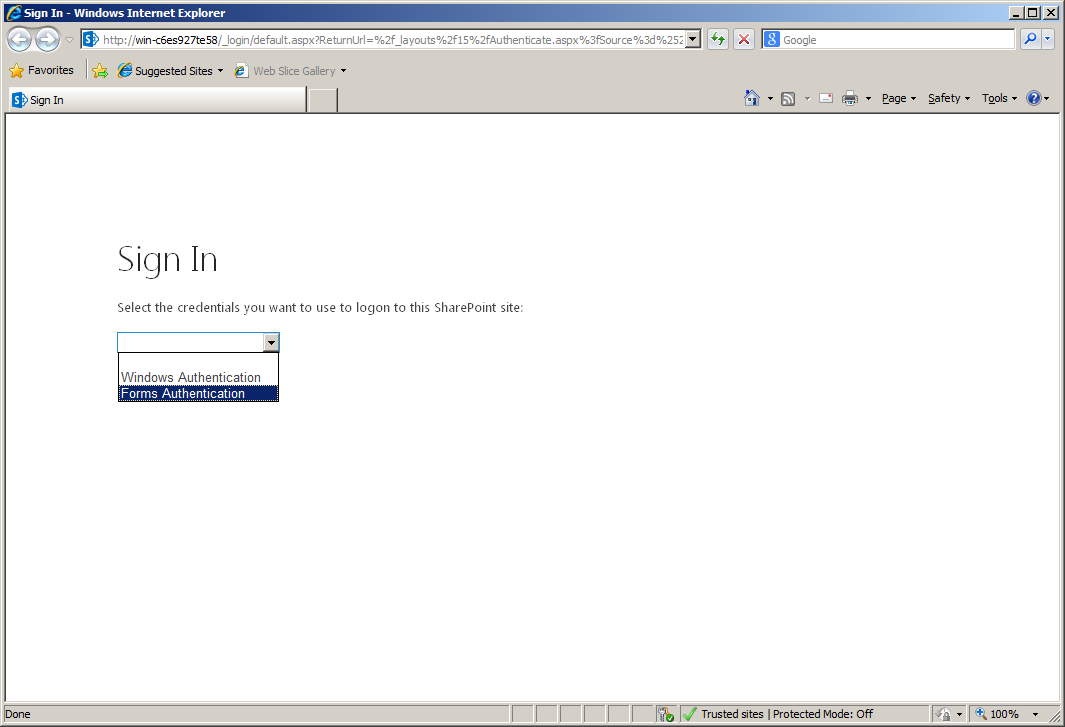
- When authenticating to the site collection, if you enabled both Windows Authentication and Forms Based Authentication, you’ll be prompted for which method you’d like to use to authenticate. I’m going to choose to authenticate with Forms Authentication.
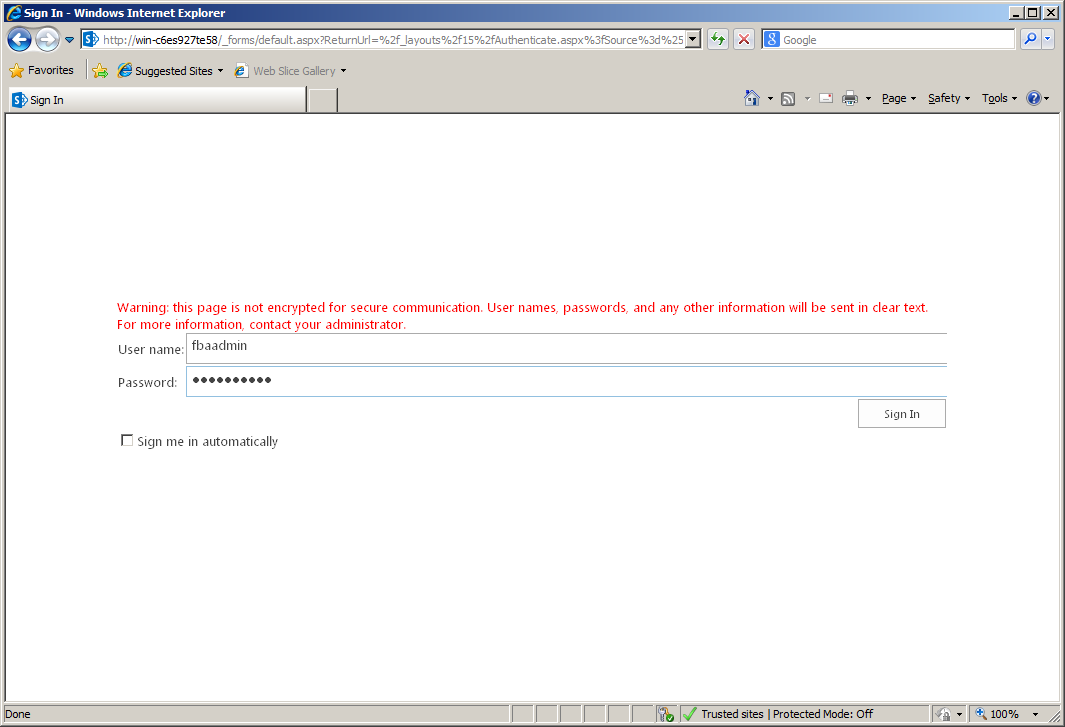
- You’ll be prompted for a username and password. Enter the username and password that we created in Section-2, and also set as the Secondary Site Collection Administrator.
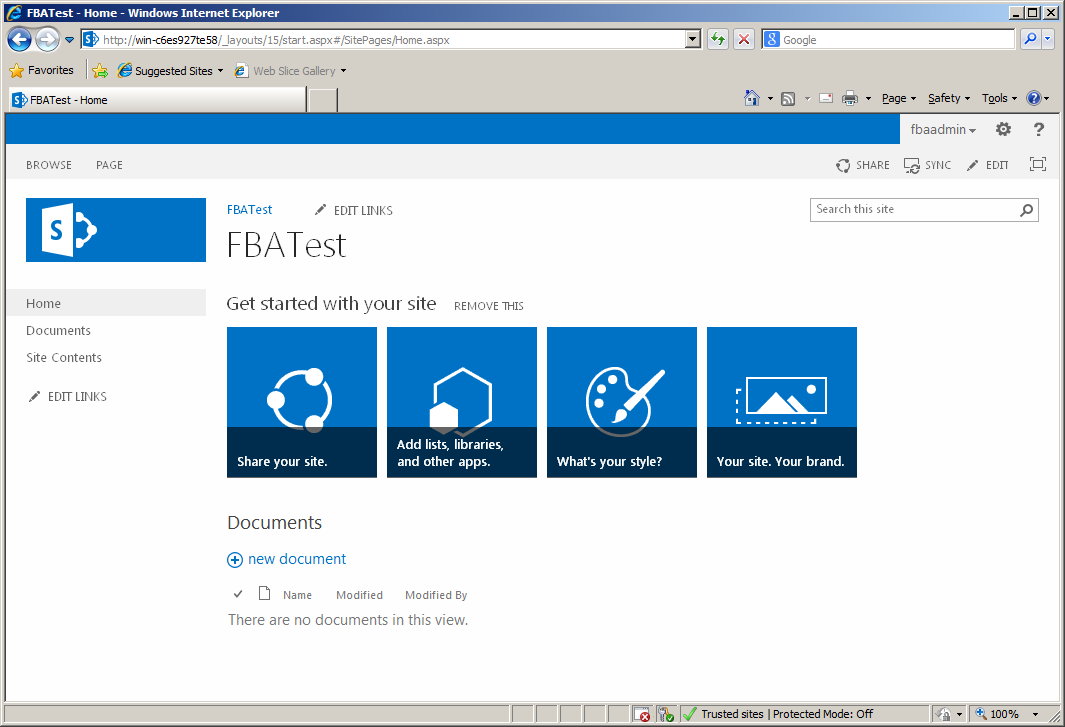
- You’re now logged into the site as a site collection administrator.