SharePoint 2013 – How to add SSL to a Web Application
Here are some things that need to be done to make SSL work and to remove the ability to hit any sites via NON-SSL. I recommend these settings if you guys plan to run SSL inside the corporate network for the 2013 instance of SharePoint.
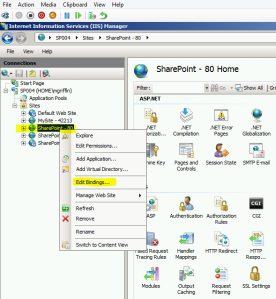
Go to IIS on the WFE and do the following:

That should do it.
Go to IIS on the WFE and do the following:
- On the SharePoint – 80 site→ Edit Bindings

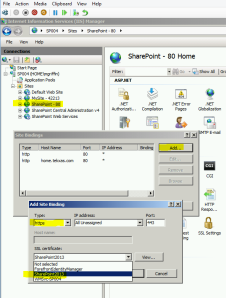
- In the Site Bindings dialogue, click Add → in the Type drop down, select https→ in the SSL Certificate drop down, select your cert.

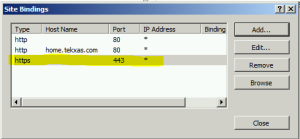
- It should look like this when you’re done

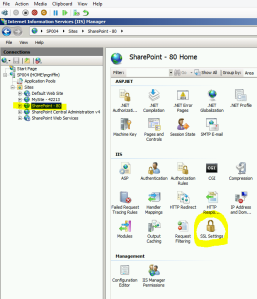
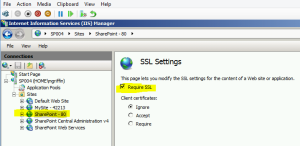
- Next, on the SharePoint – 80 site, click on SSL settings

- Select the check box for Require SSL

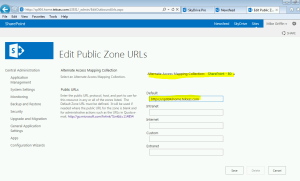
- Launch the CA. Go to Application Management → Alternate Access Mappings → Edit Public URLs
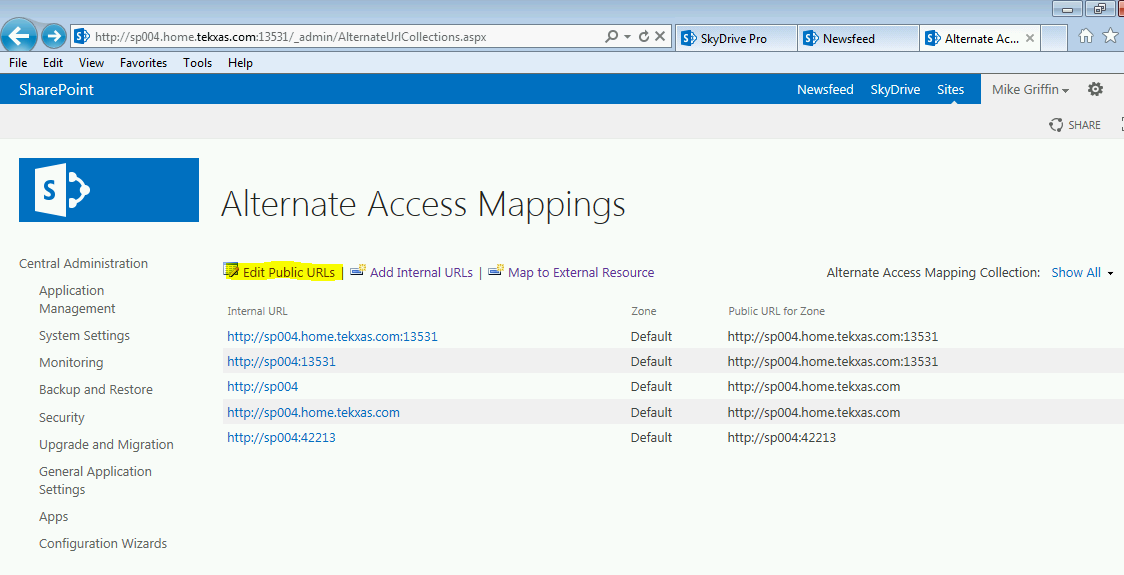
- Under Alternate Access Mapping Collection, select SharePoint – 80.
- Change the Default to to the SSL site URL (e.g., https://servername.home.texas.com). Make sure intranet, internet, custom and extranet are blank. Click Save.

- Go back to the WFE and perform an IISReset
- When IIS returns, launch the CA. Remember, after an IISReset SharePoint sites, including the CA, take a minute to launch on the first time in
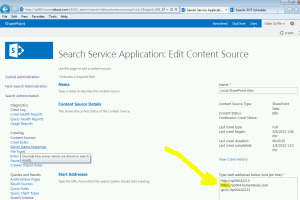
- When the CA launches, click on General Application Settings → Farm Search Administration→ Search Service Application→ Content Sources →Local SharePoint sites → Under Start Addresses, change http://servername.home.tekxas.com to https://servername.home.tekxas.com. Then run a full crawl.

That should do it.
No comments:
Post a Comment